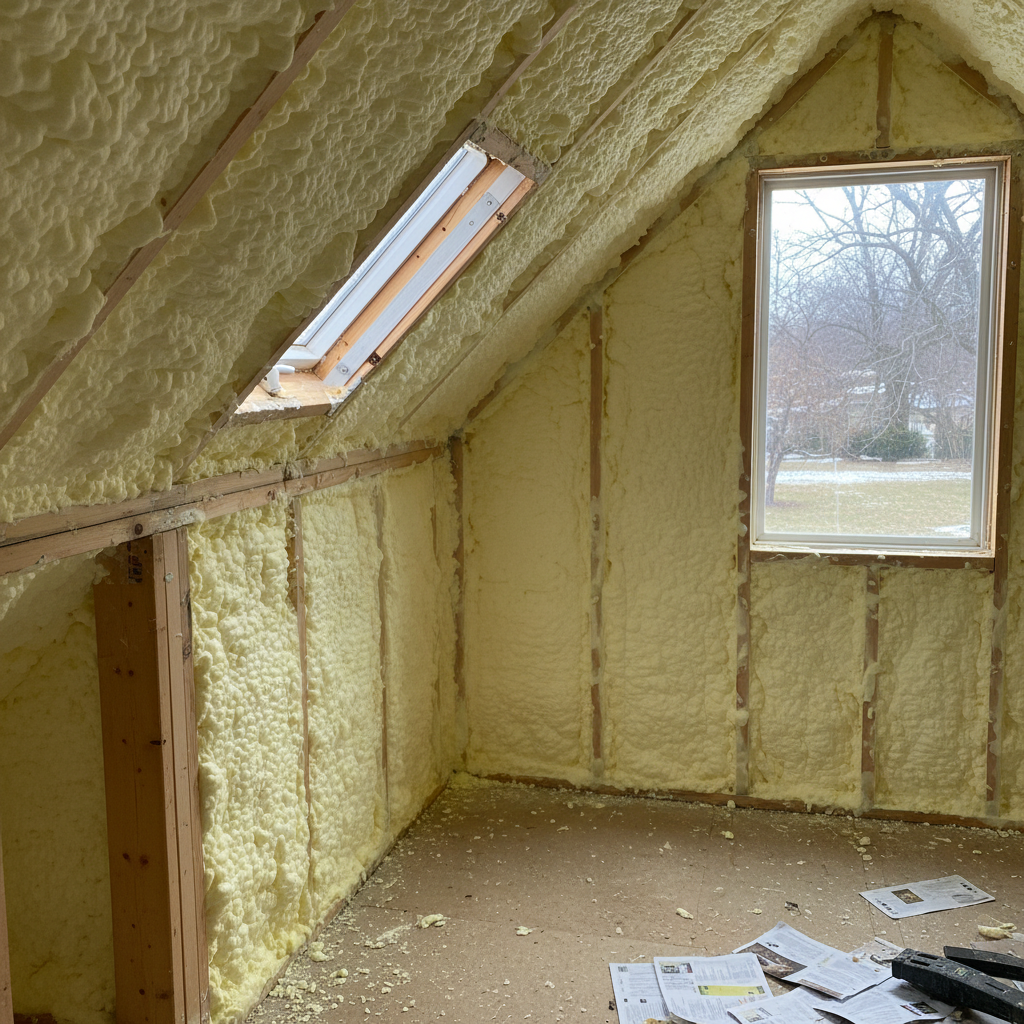
Alright, let's talk open-cell spray foam. I get a lot of questions about this stuff, especially from folks in older Arlington Heights homes near the train tracks or up by Lake Arlington who are tired of drafts and high energy bills. It's a fantastic insulation product, no doubt, but it's not a simple DIY job like throwing down some fiberglass batts. You really need to understand what you're getting into.
Before You Even Think About Spraying
First off, open-cell spray foam is kind of like a sponge. It's soft, flexible, and lets moisture pass right through it. That's a key difference from closed-cell foam, which is rigid and acts as a vapor barrier. Because open-cell lets moisture move, it's usually a better fit for attics, rim joists, and wall cavities where you definitely don't want to trap moisture. If you've got an older home with balloon framing, open-cell can be a real game-changer for sealing up those hidden air leaks, you know?
Before any foam goes in, you've got to prep the area. This isn't just about sweeping up, either. You need to:
- Clear everything out: Seriously, everything. Furniture, stored boxes, anything that can get overspray on it. Foam expands, and it gets everywhere. Trust me on this one.
- Seal major air leaks: Sure, the foam will seal small gaps, but you should still caulk around windows, doors, and any large penetrations. Think of it as giving the foam a head start.
- Address moisture issues: This is huge. If you've got a leaky roof, a damp basement, or any active water problems, fix those FIRST. Open-cell foam won't stop a leak, and if it gets wet, it can lose its insulating value and potentially lead to mold down the line. I've seen homeowners jump the gun on this, and it always ends up costing them more in the long run.
- Ventilation check: Especially in attics, you need to make sure your ventilation is either properly designed for an unvented attic assembly (if you're insulating the roof deck) or that your soffit and ridge vents are clear and working if you're insulating the attic floor. You don't want to create moisture problems by trapping humid air, do you?
Can you do this prep yourself? Absolutely. Clearing out, sealing, and fixing leaks are all things a handy homeowner can tackle. It'll save you some money on labor, too.
During the Spray Foam Project: DIY vs. Pro
Okay, here's where we get to the nitty-gritty. Can you DIY open-cell spray foam? Technically, yes. You can rent or buy small kits. But should you? For most homeowners, my answer is a resounding 'no' for anything beyond a tiny, non-critical area.
Here's why:
- The equipment: Professional spray foam rigs are complex. They heat chemicals to precise temperatures, mix them at exact ratios, and deliver them under high pressure. Get any of that wrong, and you end up with foam that doesn't cure properly, smells bad, or doesn't insulate. I've seen plenty of botched DIY jobs where the foam stays gooey or shrinks away from the studs.
- Safety: This isn't just about wearing a dust mask. The chemicals involved in spray foam are serious business. You need full personal protective equipment (PPE): respirators with specific cartridges, full body suits, gloves, eye protection. The fumes are no joke, and you need proper ventilation during and immediately after application. A pro crew will have all this, plus specialized training.
- Application technique: Spraying foam evenly and at the correct thickness takes skill and practice. Too thin, and you don't get the R-value. Too thick, and you're wasting material and money. Plus, you need to hit all the nooks and crannies without over-spraying or missing spots. It's an art form, honestly.
- Cleanup: Overspray is a real thing. It sticks to everything. Pros have protocols for masking and protecting surfaces.
For a small patch job, maybe. But for an entire attic or wall cavity? Call a pro. It's an investment in your home's comfort and energy efficiency, and you want it done right. At Allied Insulation, we've got the gear and the experience to make sure it's applied perfectly, giving you the R-value you paid for.
After the Foam is Applied
Once the pros have packed up, what's left for you to do?
- Ventilation: Even with professional application, there will be some off-gassing. Make sure the area is well-ventilated for at least 24-48 hours, or as recommended by your installer. Open windows, run fans. You want to air out any residual odors.
- Inspection: Take a good look at the work. Does it look uniform? Are there any obvious gaps or areas that look like they weren't covered? If you have any concerns, don't hesitate to call the installer back.
- Follow-up: If you had your attic roof deck insulated, you might need to adjust your attic ventilation strategy. If you had an old, leaky attic floor, you might notice your home feels much more comfortable, and your furnace or AC isn't running constantly, even during those brutal January cold snaps we get here in Chicagoland.
- Don't compress it: Open-cell foam is soft. Don't go stuffing boxes or heavy items against it if it's in a wall or rim joist. In an attic, it's fine to walk on the joists above the foam, but don't compress the foam itself.
- Future access: Remember that spray foam seals everything. If you anticipate needing access to wiring, plumbing, or ducts behind the foam in the future, talk to your installer beforehand. Sometimes they can create removable panels or leave certain areas accessible, though this isn't always practical.
Open-cell spray foam is a fantastic product when installed correctly. It'll make your home quieter, more comfortable, and significantly more energy-efficient. Just make sure you understand the process and know when to trust the experts.