Is your living room floor always freezing in the winter, no matter how high you crank the heat? Or maybe you've noticed your energy bills climbing higher than a kite on a windy day? Chances are, your crawl space insulation could be the problem. It's a common issue, especially in older Arlington Heights homes where insulation might be old, damaged, or just plain missing.
I've seen it all working around here for years, from damp, moldy messes to perfectly dry, well-insulated spaces. Getting your crawl space insulation right isn't just about comfort; it's about protecting your home's structure, improving air quality, and saving you money. Let's break down what you need to know before, during, and after this project.
Before You Start: Assess and Plan
First things first, you need to know what you're dealing with. Crawl spaces aren't exactly glamorous, but a quick inspection can tell you a lot. Grab a flashlight, put on some old clothes, and get down there. What are you looking for?
- Existing Insulation: Is there any? What kind is it (fiberglass batts, rigid foam)? Is it falling down, damp, or compressed? If it's fiberglass and looks like a wet, saggy mess, it's probably doing more harm than good.
- Moisture Issues: This is huge. Do you see standing water, damp soil, mold, or mildew? If your crawl space is wet, adding insulation without addressing the moisture problem is like putting a band-aid on a broken leg. You need to fix leaks, improve drainage, or consider a vapor barrier and dehumidifier first. We deal with a lot of clay soil around Arlington Heights, which can hold water, so proper drainage is key.
- Pests: Look for signs of rodents or insects. They love nesting in insulation, especially fiberglass. If you've got a critter problem, you need to evict them and seal up entry points before insulating.
- Access and Clearance: Can you actually get around down there? Some crawl spaces are tight, making DIY work incredibly difficult, if not impossible.
Once you've got a handle on the situation, you can start planning. For most DIYers, insulating the subfloor (the floor above the crawl space) or adding a basic vapor barrier is doable. Encapsulation or extensive moisture control? That's usually a job for the pros.
During the Project: DIY vs. Pro
Okay, you've assessed your crawl space. Now, what can you realistically do yourself?
What You Can Tackle (DIY):
- Removing Old, Damaged Insulation: If your old fiberglass batts are wet, moldy, or falling down, carefully remove them. Wear a good respirator, gloves, and eye protection. Bag it up securely.
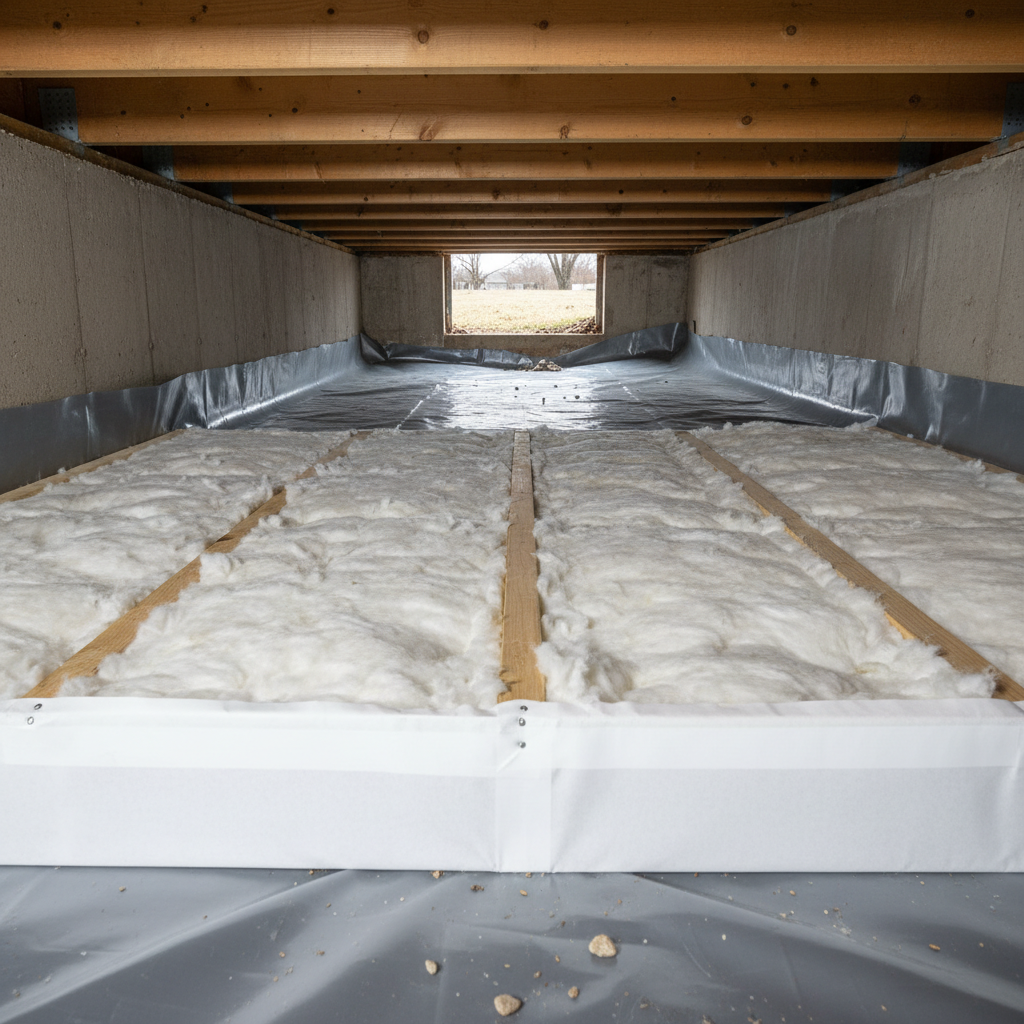
- Installing a Basic Vapor Barrier: If your crawl space floor is just dirt, laying down a heavy-duty (6-mil or thicker) polyethylene vapor barrier can make a big difference. Overlap seams by at least 6-12 inches and tape them. Run it up the foundation walls a few inches. This stops ground moisture from evaporating into your crawl space and home.
- Insulating the Subfloor (Fiberglass Batts): If you're going with fiberglass batts between the floor joists, make sure they fit snugly without compressing them. You'll need some kind of support, like insulation hangers or chicken wire, to hold them in place. Remember, the paper or foil facing usually goes up, against the subfloor, to act as a vapor retarder.
When to Call Allied Insulation (or another Pro):
- Moisture Control & Encapsulation: If you have significant water issues, chronic dampness, or want to fully encapsulate your crawl space (sealing it off from the outside, insulating the walls, and conditioning the air), call us. This involves specialized materials, sealing techniques, and often drainage systems or dehumidifiers. It's complex work that needs to be done right to avoid bigger problems down the road.
- Rigid Foam Board Installation: While some DIYers tackle rigid foam, it requires precise cutting and sealing to be effective, especially on crawl space walls. If you're not confident in your cutting and sealing skills, a pro will ensure a tight, efficient installation.
- Spray Foam Insulation: This is definitely a pro-only job. Spray foam requires specialized equipment and training to apply correctly and safely. It's incredibly effective but not a DIY material.
- Limited Access or Hazardous Conditions: If your crawl space is too tight to move around comfortably, or if you find significant mold, asbestos (in older insulation), or signs of structural damage, don't risk it. Call a professional.
After the Project: Maintain and Monitor
Once the insulation is in, whether you did it yourself or hired us, don't forget about it. It's not a set-it-and-forget-it deal entirely.
- Regular Checks: Every year or two, especially after heavy rains or extreme weather, take another peek into your crawl space. Look for any new moisture, signs of pests, or insulation that might have shifted.
- Keep Vents Clear: If your crawl space is vented (common in older homes), make sure those vents aren't blocked by debris or overgrown landscaping. If you've fully encapsulated, the vents should be sealed.
- Monitor Humidity: If you've got a vapor barrier, check for condensation. If you have a dehumidifier, make sure it's running efficiently.
Proper crawl space insulation can drastically improve your home's comfort and energy efficiency. It's an investment that pays off in lower utility bills and a healthier home environment. Don't let that cold floor bother you another winter!